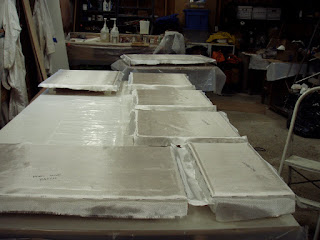
Dad and I got to the shop early today.
The deck looks great. Its really nice to walk on too! No more hatch crawling.
Tom braved the fiberglass and used a router to fine tune the gutter/deck interface. He also put a 1/4 inch bevel on all the edges.
Tom also created a jig for the router so that he could even out the inside edge of the gutters. Turned out is was a good thing he did it. One spot was 3/16th too high... we would have been really bummed when our hatch lid didn't lay flat. That would have been one backward moving day!
Tom cut out the drain holes for the hatch gutters.
This is a pic of the drain hole of the starboard side hatch gutter.
Pic of the drain hole for the front cross hatch gutter.
I decided to go old school on the drainage. No drain tubes. I'm thinking that I'll be able to install those later if it turns out I need them.
We also glued on the deck of the bow and stern hatch.
This is a pic of the stern hatch glue up.
Last thing today was to put glass on the tops of the hatch lids.
They have a 1/4" bevel on them...just enough to bend the glass around. It took some time but it seems to have worked. The vertical corners are gonna need a little touch up as the glass did not lay very well in those spots.
12/19/09
Day 38: Hatch Gutter Installation, Hatch Lid Fiberglassing, Deck Routing, Drain Cutting
Labels:
dory,
hatch gutter,
hatch lids,
router
Subscribe to:
Post Comments (Atom)


what are those wire clamps called, that you used to do these hatch glue ups?
ReplyDeleteHi Jeremy, When do you begin your next masterpiece? I was calling those clamps "spring clamps" but I actually don't know the real name. I'll find out for you. There is a little wrench-like tool that is used to open the clamp an then the clamp pinches on its own.
ReplyDeleteSo, I looked them up and they are called spring clamps. Here is a link:
ReplyDeletehttp://www.gm-werkzeuge.de/gehrungsspannklammern.html Hopefully they can be found here in the US too.